SHOOTING
THE BLACK POWDER REVOLVER
© John L. Fuhring Cleaning the black powder revolver This is the 4th of 8 articles Link to article 1 A special word for those with new
revolvers
New revolvers usually come covered,
inside and out,
with a protective layer of a thick petroleum grease and the initial
instructions recommend removing this grease with soap and hot water
before using the revolver. A one time cleaning with soap and
hot
water won't hurt, but I recommend simply swabbing out the bore and
wiping down everything with WD40 as a solvent. The
small
amount of WD40 that remains will not build up fouling if shooting
grease is used as I recommended in an earlier article.
Shooting
with grease behind the bullets and subsequent cleaning as described
below will complete the initial cleaning process.Another thing for owners of new stainless steel revolvers to remember is that yes, they do not rust, but stainless steel can pit. Revolvers made of stainless should be cleaned with just as much care as their blued steel brothers. The
importance of NOT using water when cleaning the black powder revolver
Black powder
revolvers (if not made out of
stainless steel) are manufactured out of a mild steel that is a
rather
pure form of iron. The composition of the metal makes them
very tough
and not as subject to corrosion as objects made of higher carbon
steels.
The fact remains though, they are still iron and iron rusts and pits.
From experience, we know that iron surfaces are protected from rust by a layer of grease or oil. We also know that rusting is mediated and enhanced by the presence of water acting on the surface of unprotected iron. In light of this, I have come to the conclusion that water and especially soap & water should (almost) never be used to clean a B.P. firearm. Consider this too, it is a very bad idea to clean a cast iron skillet with dishwashing detergent, thus removing all the anti-sticking properties of a "seasoned" iron skillet. I think it is reasonable to assume that a certain amount of greasy material should remain in the microscopic pores of the iron of a firearm's barrel and this is what I call "seasoning." This material will not harm the metal, but will protect it from both corrosion and fouling. If it is removed by washing out with soap and water, then the metal may be exposed to rusting and as you shoot, fouling will almost certainly have a greater tendency to stick to the inside of the barrel. Having said all that, an exception might be if the bore is seriously clogged up by shooting blanks (as at a battle reenactment). If a cleaning rod will not fit down the bore, there may be no alternative but to flush out with water -- just avoid using soap or detergent. Even here, if you start by using a undersized cleaning jag and run a patch down the bore liberally soaked in jojoba or vegetable oil. The fouling will eventually dissolve and will clean up with additional patches. In my opinion, using water (or worse, soap and water) should be used only as an emergency last resort when you don't have any other solvent to use and your cleaning rod won't go down the barrel and besides that, it stinks to high heaven as hydrogen sulfide gas is generated when water touches the fouling.For all these reasons, I urge you to at least try cleaning your revolver the easy way and without water. I assure you that all my metal surfaces, both inside and outside are rust free and everything stays that way between shooting sessions. For those who go so far as to put parts of their revolver in electric dish-washers or boil them in pans on the stove (and there are people who do this), I know that this simple method I'm suggesting is pretty radical and I don't blame you for being skeptical, but give it a week's trial. Clean your pistol as I've suggested, put it away and then inspect it inside and out and see if you can find a speck of real rust anywhere. Don't take out your cylinder's nipples every time, but leave them in for a while and see if they rust or become hard to remove. I sincerely believe that you will find this waterless method of cleaning more pleasant to do and better for your pistol than what you are doing now. If you try it and it just doesn't work for you to clean this way, I would be very grateful if you would please write me at my geojohn address and give me all the details, but please don't write a long article and post it to my guestbook. Oh lord, I feel another one of my
philippics coming on
Before I let go of this topic, I want to say
something about what I
call "the cult of cleaning" that some of us old timer's practice and I
apologize up front for any hurt feelings: It is my firm belief that overemphasis on cleaning (to the point of being anal about it) is not only not necessary, but it discourages a lot of people who might otherwise be interested in black powder shooting. Over the years, I've had some really nice conversations with people at shooting ranges regarding my black powder revolvers and what it takes to shoot them. Almost 100% of the time my visitors tell me that one of the main reasons they don't want to try this sport is because of the stories they have heard regarding the terrible mess it is to clean up after shooting. HOWEVER, when they see my targets and when they see that I have no cleaning supplies on the bench and when they hear how I simply wipe out my pistols with dry patches after shooting, they are amazed, but skeptical. If they are interested, I then take the cylinder out, hand them the parts and ask them to find a speck of corrosion on or inside anything. I have them look down the barrel so that they can see that the rifling is not covered by fouling and that also seems to amaze them. I tell people, no, our black powder revolvers do not need to be NASA Clean Room clean or meet the antiseptic standards of a hospital's Operating Room to shoot well and reliably. Our pistols were designed for wartime conditions and for use by Doctor Killzum (and we all know that his patients die). If you get too anal about cleaning a pistol, you not only harm the metal of the pistol, but you waste your time, you stink up your house AND (very importantly) you contribute to that bad reputation our sport absolutely doesn't deserve. And we do all this and for what?!? The pistol won't shoot any straighter and it won't have less rust inside it, so why do it? You know, people have even accused me of being "lazy" because I prefer a simple and quick method of cleaning that works as well or better than their more complicated and elaborate method of cleaning. OK, I admit it, I'm lazy. I also think flowers are pretty as they are and don't need me to spray paint them. I think that gold coins look fine just as they are and don't need me to gold plate them. I also think I don't need to take a shower every time I use the toilet, so yes, when it comes to unnecessary work and especially work that does more harm than good, I'm pretty darn lazy. I mean I'm REAL lazy because I just won't do it. Of course, it is easy for me because I left the "Cult of Cleaning" a long time ago and am no longer a "True Believer" in its dogma. Now, having said all that, if you can't sleep at night because you haven't performed all the elaborate and sacred acts of ritual purity on your spotless weapon, if it disturbs you to know that a tiny amount of greasy fouling remains in the microscopic pores of the steel of the barrel (doing its job of protecting the iron) and if you can't get the worry out of your mind that somehow your pistol is unhappy and feels "dirty" by not being boiled out and scrubbed out right down to the bare metal or the magnetite layer of the bluing, then, by all means do what you need to do to maintain your peace of mind. Flush it out with with a boiling hot fulmination of Professor Smackdab's Lemon Scented Homeopathic Snake Pee, scrub it out with Ma Frickert's Patented Extra Strong Lye Soap, flush it out with Baron Otto von Kraut's Famous Mauser Juice, run the harshest cleaners and solvents you can find through your pistol, but I would like to ask you to NOT tell beginners that they have to follow your practices in order to enjoy our sport. If you do, you are likely to turn them off and prevent them from even wanting to try black powder shooting and that would be a great shame. No, beginners would be well advised to learn and follow only those simple methods that are perfectly effective, but in conformance with the principle of "K-I-S-S" (keep it simple sonny) or, as I did in the early days, they will quickly loose interest in black powder shooting or never even try it. One more thing. Too many of us treat our revolvers as if they were human instead of a hunk of iron. When we've gotten ourselves all dirty and greasy, the first thing we want to do is hit the showers and soap ourselves down in hot water. Iron and steel parts thrive being oily and greasy all the time. Just like my horses after a hard ride, they like to roll in the dirt and paw the ground until allowed to do so. Once they have their roll, they like to be brushed off, but they really don't like a bath. Thinking they are "like us" and "must feel dirty" we give them a bath anyway, but the first thing they do after a bath is roll in the dirt and they are only happy when they are filthy once again. Don't make the mistake that what you like is necessarily good for other creatures or inanimate objects. OK, rant over. If you would like to take me to task over any of this, please don't post in my guestbook, but write me at my geojohn address and again, I apologize for any hurt feelings. Loading
with grease behind the bullet makes cleaning fast and simple
If you loaded your revolver
with
grease behind the slugs (please see my article on "fouling
management"), cleaning the bore should simply
consist
of running clean dry patches made from pieces of paper towel down the
bore until the last one comes out
reasonably clean. Start by putting a patch on a jag that is
made for your bore (.45 or .38) and running it down. This operation can be done before leaving the range or at home.  Typical cleaning jags The first patch should come out with a small amount of black greasy residue and then all you have to do is keep running clean patches down until the fouling is gone. It is my firm opinion that any further cleaning and especially with substances that will remove the "seasoning" in the barrel, is harmful to your revolver and you should avoid using them regardless what the "common wisdom" says about it. If you don't use enough grease (or no grease at all) behind the bullet when you shoot, there will be times when the bore will feel rough when you slide that first patch down. Under these circumstances, liberally soak a patch in jojoba oil, olive oil or vegetable oil, run it down and then wait a bit for the hard stuff to dissolve. After the fouling dissolves and turns into a black goo, keep running patches down the bore as described above. Next time you go out shooting, try using a little more grease behind the slug when you load. It will not only make cleaning a lot easier and faster, but your accuracy will improve noticeably. When the bore starts looking pretty clean, run a patch covered with your favorite shooting grease or jojoba oil down to protect the metal from corrosion and to keep the fouling from building up at the beginning of your next shooting session. Cleaning the cylinder can be a bit more work since heavy fouling may build up inside the bottom of the chambers especially if you didn't use enough grease during your last shooting session. If you have a lot of hard fouling down inside your chambers, liberally soak a patch in oil and put the patch down each chamber and through the hole in the center of the cylinder. Let this stuff work for several seconds then wipe out the liquefied fouling with clean tissue paper or cloth. Keep wiping everything out with cloth or tissue paper until all residue is removed and the last cloth or paper comes out reasonably clean. Take an old tooth brush with a little oil on it and brush out around the cones and cylinder stop holes. Put a light coating of olive oil, jojoba oil or shooting grease in and around everything. It might not be a bad idea to remove the cones every now and again, clean the threads and then coat them with a tiny amount of grease before you put them back in. The cones should be lightly "snug" but avoid over-tightening them. As a final step, take a small rag or a piece of paper towel soaked in a small amount of jojoba oil (or other vegetable oil) and wipe down the cylinder pin (arbor), the frame (inside and outside), the hammer, the external parts of the barrel and the rammer mechanism. Reassemble your revolver then wipe down all external surfaces with the rag to leave a light coating of oil on the metal surfaces.Your revolver is now ready to take to the range tomorrow or next week or next month. In every sense of the word, your revolver is 'clean' because it looks and functions identically to an oiled revolver that has been through a dishwasher, only it had no opportunity to develop a coating of rust from being in water. Best of all, it was cleaned in a small fraction of the time needed to clean the "traditional" way. Lead fouling
Because black
powder is a low pressure propellant that accelerates the bullet slowly
in a long barrel and because the grease behind the bullet results in a
barrel that is always greasy, lead does not build up in the black
powder revolver's barrel. Because of all these factors, lead
fouling is of no concern to us. An additional word on the
corrosiveness of black powder and black powder residue
I thought I'd add
something to what's
already been
said. Contrary to a lot of opinion, I have found no evidence
that
dry black
powder or black powder residue (fouling), by itself, is corrosive and I
have found no evidence that either of those substances attracts
moisture either. I have found this especially true when there
is
a
residue of grease left behind after firing a grease-behind-the-ball
charge. It was years ago when I first noticed that greasy
black
powder
fouling in my flintlock rifle wasn't causing rust. I'd take
my
flintlock hunting and fire it, then I'd reload it, but a lot of times
I'd have to wait a week or more until I could empty and clean it.
When I'd go to clean it after having all that
greasy fouling in there for so long, I noticed that the barrel would
clean up without a trace of brown rust coming off on my patches.
I also noticed that
when I'd go looking down the bore, it was shiny inside. I
found
this was also true
when I'd delay cleaning my revolvers. I know that old time primers use metal fulminates and potassium chlorate as an explosive so that after firing they leave a residue of potassium salt in the barrel. Potassium chloride powerfully attracts moisture. Smokeless powder leaves no greasy residue in the barrel to protect it, so the potassium salt and moisture from the air almost immediately starts to attack the iron. We all know that we must clean a firearm immediately after shooting cartridges loaded with these kinds of primers, but black powder fouling does not contain potassium chlorate and is not even in the same class with corrosive primers. More importantly, if you load with grease behind the ball, the greasy residue that remains after firing provides a barrier to moisture and without moisture, the iron can't corrode. Here again is something you should experiment with for yourself. Try my waterless method for a week or two and carefully monitor your revolver for rust inside and out. If I'm wrong, you can go back to putting your pistol in the automatic dishwasher and start scrubbing it out with the harshest detergent you can find, but if I'm right, just think how much nicer and easier cleanup will be and how much your revolver will appreciate it (not to mention how much better your house will smell). Commercial cleaning products
There are many
cleaning products for sale that many people absolutely swear by.
A particular favorite that is in style right now
is Ballistol, a so-called "soluble oil" meant to be mixed with
water. Ballistol was originally formulated as a cutting oil,
but
was found to work marvelously in early Mauser rifles that shot
cartridges with corrosive primers. Those cartridges and their
bullets left no protective grease in the barrel to protect the iron, so
cleaning with Ballistol + water was an effective flush that removed the
corrosive salts. The down side of using any water based
cleaner
is when the water evaporates, yes it leaves behind a protective layer
of oil, but it can condense elsewhere (like in the action) to cause
corrosion.To directly answer a question many people have asked me, no, I do not recommend Ballistol or any of these other products, but experimenting is fun and if you are interested in trying something exotic or what's in fashion, you might find a cleaning method that's even easier and better than what I have suggested. My method is ultra simple, cheap, fast and effectively protects the revolver, so I really doubt that you will need any of this other stuff, but that is for you to decide. A special word for those who need
to restore a badly neglected and rusted revolver.
UNDER NO CIRCUMSTANCES USE A
RUST REMOVING COMPOUND! Rust
remover, if it touches the outside of a revolver will destroy
color-case hardening and bluing or will make it streak. This
is
because the tough blue layer is actually magnetite, a form of iron
oxide (that's why a stainless steel pistol can't be blued) and rust
remover will attack it. Rust remover in a bore may actually cause
pitting. Now, having said that, a rusted revolver is not the
end
of the world. A rusted revolver almost always looks much worse than it really is. The first thing to do is disassemble the revolver down to the last screw, but you may have to soak it in penetrating oil to get all the parts out of the action. The absolute best penetrating compound is automatic transmission oil mixed with acetone. Once all the internal parts are out of the lock mechanism (see disassembly instructions below), simply clean them with a bronze brush and all the channels with a .22 caliber bore brush soaked in oil. You do not have to polish the parts or the insides of the lock mechanism and you should not try to remove the rust discolorations. Simply be sure all the metal surfaces are reasonably smooth. To remove rust from the outside of a revolver, simply work in oil by rubbing with a cloth and softening the red rust with oil. In extreme cases, tough rust can be removed by soaking in oil and then burnishing with an oily bronze brush. Magnetite (what the blue layer is composed of) is harder than either red rust or bronze, so brushing the revolver shouldn't affect the finish below the rust. Most of the time the original bluing will be preserved and you may be pleased at how good the revolver looks once the rust is off. Surprisingly, a badly discolored or even pitted bore will shoot acceptably well if you use grease behind the bullet as recommended earlier. Once a bore becomes rusty, it will never be as shiny as when the revolver was new, but its rifling will function just as well to spin up the bullets for maximum precision when shooting. As with heavy rust on the outside, an oiled bronze bore-brush may be used to remove heavy rust, but after that initial treatment, I do not recommend ever using a bronze brush again. When you go to swab out the bore, you will find that a slight rust discoloration will appear on clean oily patches even after several have been used. When the patches show only a slight amount of rust discoloration, stop cleaning and start shooting as you normally would. Normal shooting will remove all but the metal discolorations and any pitting that might be remain. Believe it or not, there may be an advantage to having a bore that has a fine roughness (even pitting) caused by neglect. This is because the microscopic roughness and pitting form reservoirs that hold grease and that may help to prevent fouling from building up. If it really bothers you that the inside of your bore (where nobody can see it) is not beautifully shiny, sell the pistol and buy a new one, but I think that is silly - you don't buy a new truck just because your great old truck has a ding or two in it. The main thing to remember is "handsome is, as handsome does" and "ugliness is only skin deep" and a good shooting revolver that functions well is a good thing to have regardless of cosmetic (especially internal cosmetic) factors. Deep
cleaning the action
If it has been
a while since you last disassembled
your revolver and especially if the action feels gummy, you will need
to
do a more complete cleaning. You have a choice here, you can
give your revolver to an expert or you can do it yourself, but
if
you don't know which end of a
screwdriver to use, if you are a complete klutz with tools and small
machinery and you tend to bung things up, do yourself a favor and take
your revolver to a gunsmith for
cleaning. If you are good at taking small things apart and
reassembling them
and are a careful and patient worker with a good set of screwdrivers,
you might want to
try the following:
Disassembly Note: before attempting to disassembling your revolver, you must have a good set of screwdrivers that fit your screw-heads exactly and you must be very careful to line it up properly with adequate downward force or you will bung up the heads. Bunged up screw heads don't hurt anything, but they sure look awful. If you have a Colt, remove the back strap and grip, then loosen the mainspring screw and rotate the mainspring off the hammer. Remove the trigger guard and expose the inner mechanism. If you have a Remington, remove the grips and loosen the mainspring screw. There are several ways to remove a Remington mainspring and here's my "brute force" method: with the hammer all the way down, screw out the mainspring tension screw and gently tap out the mainspring at its base with a small brass or plastic hammer. (OK, Remington mainsprings are a pain in the butt, but you will figure it out). Take off the trigger guard to expose the mechanism. With the mechanism exposed and the trigger pointing up, you will see a flat spring with two sections held in by a single screw. This is the "cylinder stop and trigger return spring" and you will see that it is held in by a broad head screw. Remove the screw and the spring. Next remove the screw (or screws) that hold in the trigger and cylinder stop pieces. Remove those pieces also, but note how they fit in the frame. Next, remove the large screw that holds in the hammer. Carefully - very, very carefully - slide the hammer down into the frame. A small piece called the "hand & spring" will be visible. If you have a Colt, the hand & spring can now be separated from the hammer and both removed. If you have a Remington, don't attempt to push the hammer all the way down like you would on a Colt, but push it down only enough to expose the "hand & spring" screw. Unscrew the small pin that attaches the hammer to the "hand & spring" and then remove the hammer from the top. When you remove the hammer and the hand & spring parts, note how they fit into the frame for future reference (hint: the spring is to the rear, the hand to the front). When you remove or install the hand & spring, be very careful because the spring is very easily damaged and it is so easy to put the wrong kind of pressure on the little spring. Damage to the spring will require you to fit in a new hand and spring (see next article) because the spring is integral with the hand. 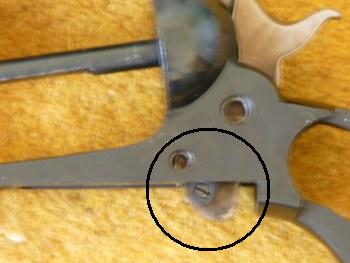 Unscrew the pin that attaches the hand & spring to the Remington style pistol's hammer then carefully draw the hammer up and the hand &spring down through the bottom. At this point, your revolver is completely disassembled. Your next step is to soak a liberal amount of B.P. solvent (or jojoba oil) on a "Q-tip" and clean everywhere inside the revolver’s frame. Keep changing "Q-tips" until every speck of residue is removed, especially deep inside where the hand & spring operate. Thoroughly clean all the internal parts you removed previously. Reassemble all the internal parts starting with the hammer. Slide it down and attach the "hand & spring" and just be damned careful when you slide the hammer back into place that you don't ruin the "hand & spring" when you do - be gentle. Getting the mainspring back in is easy or difficult depending on which type revolver you have. The Colts couldn't be easier because all you have to do is put the hammer all the way down, swing the mainspring over and under the rear (while pressing down) and simply tighten the screw down. If you have a Remington, just remember: lesser men than you were able to get the spring back in. Don't put the hammer's screw in just yet. Allow the hammer to be as high up in the frame as possible and then put in the spring while gently tapping it into place with a brass or plastic hammer. Once the spring in in, take a piece of wood or plastic and jam it in near the top of the spring so that you can get the hammer lined up with the screw hole and when you have it lined up, put the screw in. When all the parts are back in, tighten up all the screws "snug" but not over tight. Don't forget to screw in the Remington’s mainspring tension screw, but only tight enough to reliably explode the caps or the hammer pull will be excessive. Here's a tip: if the hammer tension feels right, it probably is, but if a cap fails to explode while you are out shooting, give the tension screw a little more twist. Before you put the trigger guard back on you should place a small drop of lubricant on the internal friction surfaces then wipe off as much of it as you can. Certainly, real Sperm Whale oil is what our ancestors used and is still may be the best lubricant for this application. I haven’t seen whale oil since I was a kid and don’t know if is available for love or money, but I have recently heard that jojoba oil is almost identical to Sperm Whale oil chemically and so far using it has worked out well for me (see note @ below) but I don't use it to lubricate the gunlock mechanism because it turns real thick in cold weather. I generally use quality petroleum based gun oil and it works OK, so maybe that's your best bet if you don't want to use jojoba for internal lubrication. Let's face it, when shooting black powder, gunk is going to get in the mechanism no matter what lubricant you use and you will have to deep clean your pistol from time to time. This is especially true of the Colt type pistols where you have a direct channel from the cone's blowback on firing right into the gunlock mechanism. Anyway, before you put in the "cylinder stop and trigger return spring" and its flat head screw, make absolutely sure the trigger is in the forward position and that half of the spring is resting on top of the trigger's flat spot. Don't have the spring below the trigger's flat spot or you might break it when you go to cock the pistol and besides, the trigger won't return after cocking. How much oil to put in the action
after
cleaning
People have asked me how much oil they should put
on the small moving parts of their revolvers and to tell the truth, I
don't think there is an easy answer. I prefer to put a drop
or
two of a premium gun oil on a small cloth and wipe the parts with it
just before assembly so that just a tiny amount of oil is in there to
attract grime and fouling particles. Other people like to
have
lots of oil in there to prevent wear or something. As far as
I'm
concerned, it really doesn't make much difference and you should do
what makes you most comfortable. If you want to use a lot of
oil,
go ahead and use a lot of oil. The only possible downside to
using too much oil is that oil attracts grime and that means that you
might have to clean your action a little more frequently.
Instead
of every three years, you might have to clean it every two years or
something like that. As you have seen and maybe by your own
experience, deep cleaning the action is no big deal, no big deal at all
and it won't place a burden on you if you clean your pistol's action a
little more often than necessary. You know, here's another
area
where you can have some fun experimenting. Try different
products
-- maybe even a dry lubricant -- and see what works best for you.
Gunsmithing
If you do a lot
of BP revolver
shooting, you
will sooner or later require some basic gun smithing requiring the
fitting of new parts. You can
send
your revolver to a real gunsmith ($$ if you can find one who'll do it)
or a friend who knows how to fit parts
or you can read my next article and try to do it yourself.
The
worst you can do is ruin some inexpensive small parts and waste a lot
of time.
The next page contains my thoughts and experiences doing some
minor gunsmithing on black powder revolvers. End of page 4
If you have entered this page from a search engine, I would like to invite you to start at page 1 Continue
on to Page 5 of
my Revolver Articles
or Select another revolver article or See my other shooting articles that includes three articles on flintlock shooting If you are planning to leave without continuing, If you have any detailed comments, questions, complaints or suggestions, I would be grateful if you would please E-mail me directly Return to my Home Page @
Lately I have obtained a generous bottle of jojoba oil from Trader
Joe's for just a few bucks and I've been experimenting with it.
So far, I am really impressed with it as a fouling solvent
and as
a lubricant for the revolver's internal mechanisms. The oil
penetrates well and when I used it to clean up my flintlock rifle, I
found that it dissolves fouling about as well as black powder solvent.
As mentioned earlier, jojoba oil is reported to be chemically
very similar to Sperm Whale oil and because it is really a liquid
paraffin, it should not dry out or thicken up and it should not combine
with fouling to become tarry.
|